---
hide:
- toc
---
The input to SLEAP are video files, so we'll first need to load some data to work with. For this tutorial, we've prepared a couple of videos that represent a typical behavioral setup in the lab.
## Download the Data
To follow this tutorial, you need to download the required data by **cloning a Git repository**. Don’t worry if you’ve never used Git or a terminal before—just follow the steps below carefully.
### 1. Open a Terminal
You will need to enter commands in a **terminal**. If you're unsure how to open one, follow these instructions:
#### How to open a terminal:
!!! hint ""
=== "Windows"
Open the *Start menu* and search for **Command Prompt**.
=== "macOS"
Press Cmd + Space, then type **Terminal** and open it.
=== "Linux"
Press Ctrl + Alt + T to open a new terminal.
### 2. Check If Git Is Installed
Once your terminal is open, check if Git is already installed by typing:
```sh
git --version
```
If you see a version number (e.g., git version 2.39.1), Git is installed, and you can skip this step. If you get an error, follow the steps below to install Git.
**How to Install Git:**
!!! hint ""
=== "Windows"
1. Download the Git for Windows installer from [git-scm.com](https://git-scm.com/downloads/win).
2. Run the installer and follow the default settings.
3. Once installed, restart your terminal and run 'git --version' in terminal to confirm the installation.
=== "macOS"
1. Open a terminal and type:
```sh
brew install git
```
If you don’t have Homebrew installed, first install it by running:
```sh
/bin/bash -c "$(curl -fsSL https://raw.githubusercontent.com/Homebrew/install/HEAD/install.sh)"
```
=== "Linux"
On **Debian/Ubuntu**:
```sh
sudo apt update && sudo apt install git
```
On **Fedora**:
```sh
sudo dnf install git
```
Once Git is installed, you're ready to proceed!
### 3. Navigate to the Desired Location
Navigate to **Desktop** folder, to clone the git repository. This step ensures tutorial data is saved in **Desktop**:
=== "Windows"
```sh
cd Desktop
```
=== "macOS"
```sh
cd ~/Desktop
```
=== "Linux"
```sh
cd ~/Desktop
```
### 4. Clone the Repository
Now, type the following command and press Enter:
```sh
git clone https://github.com/talmolab/sleap-tutorial-data.git
```
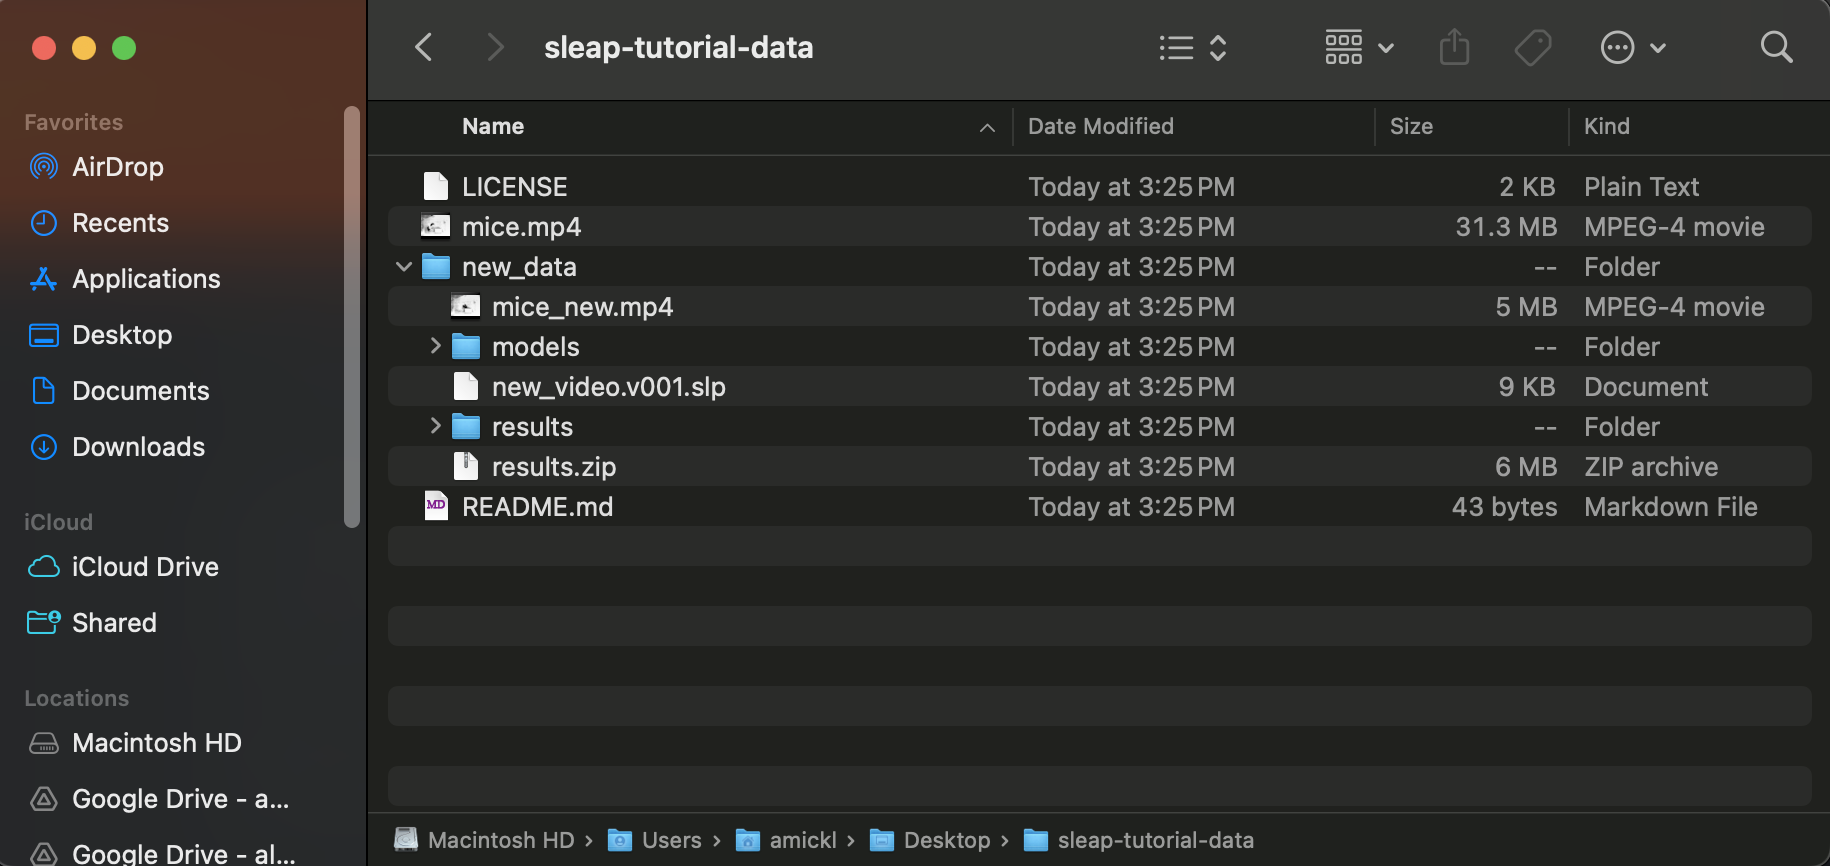
The cloned folder/tutorial data will be located on the Desktop under the name **sleap-tutorial-data-main**. The folder will contain the following:
- **mice.mp4**: The main video file for training the model.
- **new_data**: This folder will be used later in [Step 6](tracking-new-data.md).
## Import videos into SLEAP
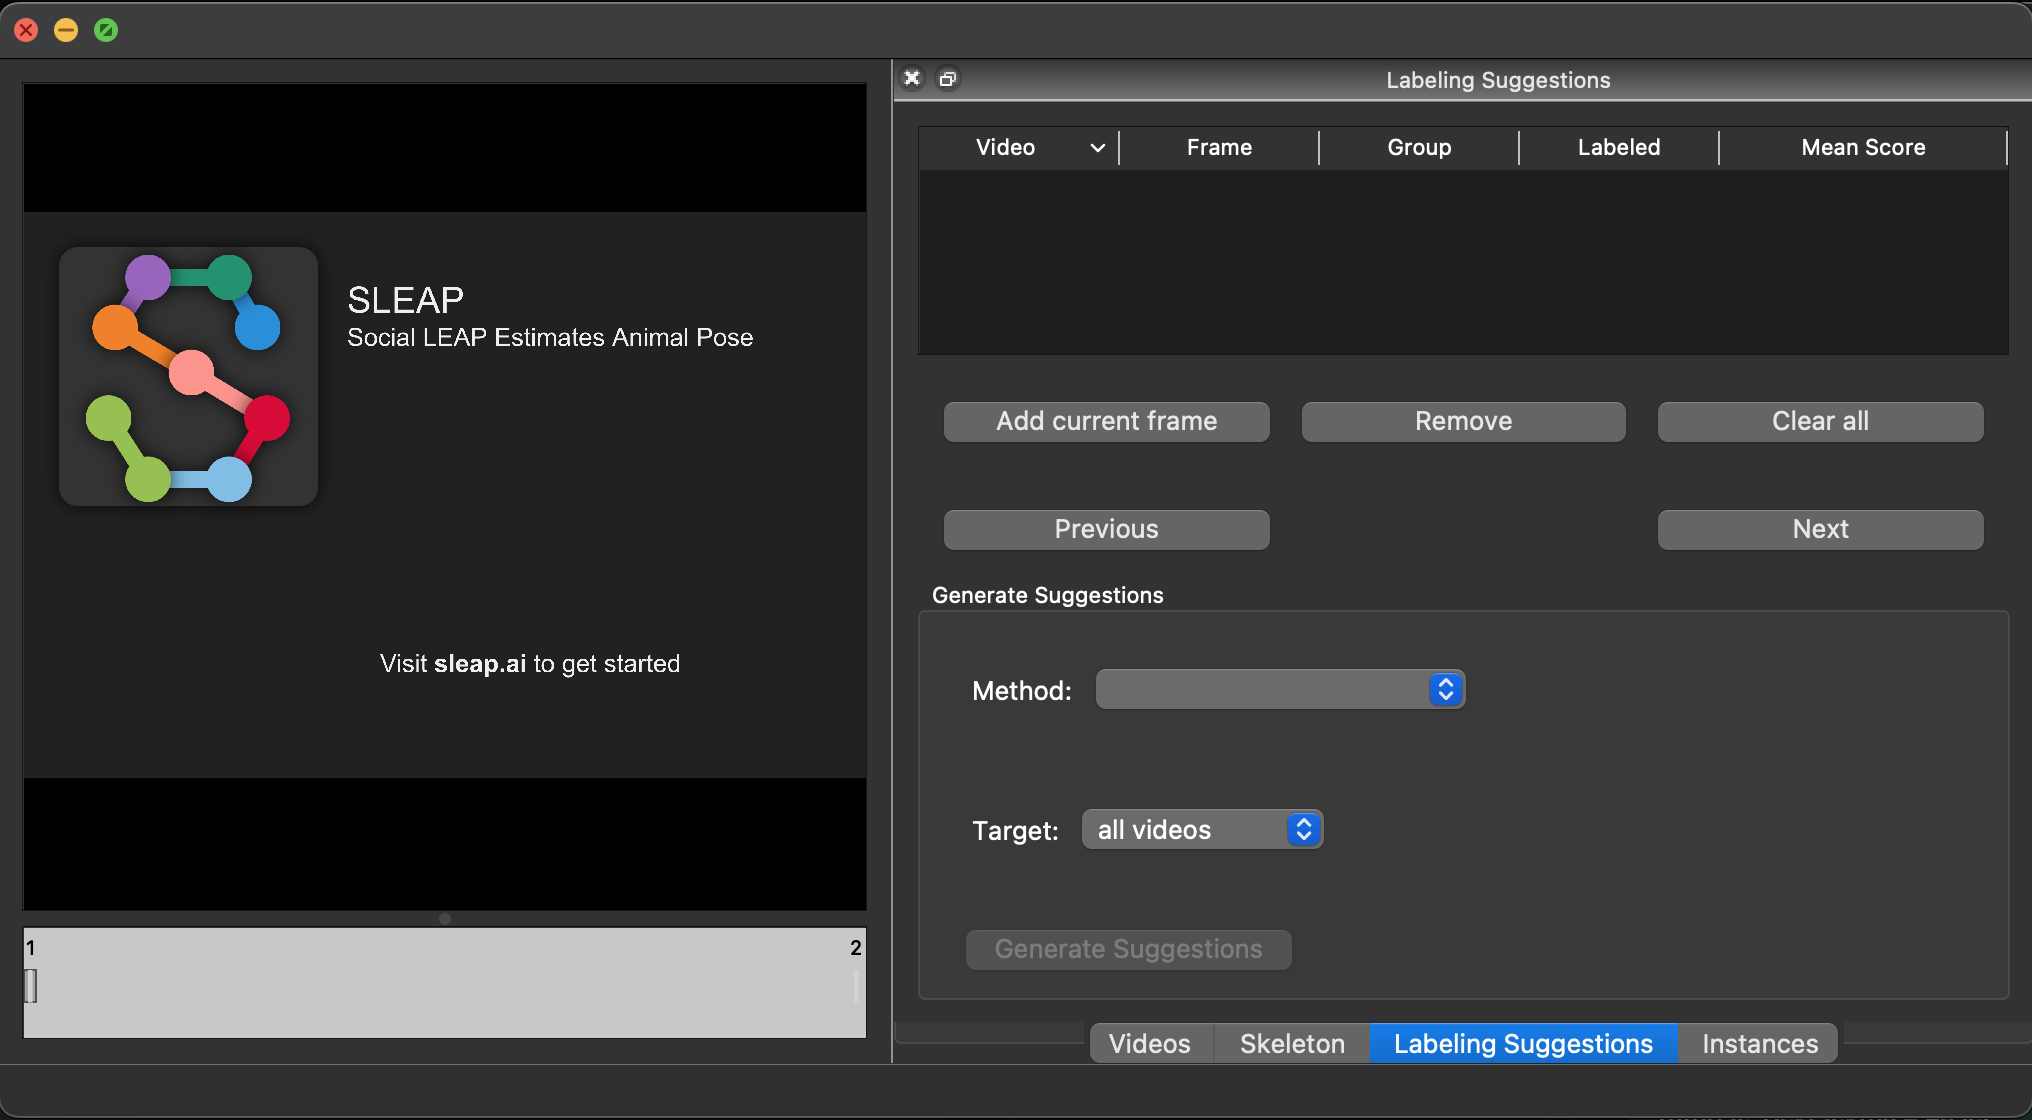
1. Open a terminal. Then launch the SLEAP GUI by typing this command followed by Enter or Return:
```bash
sleap
```
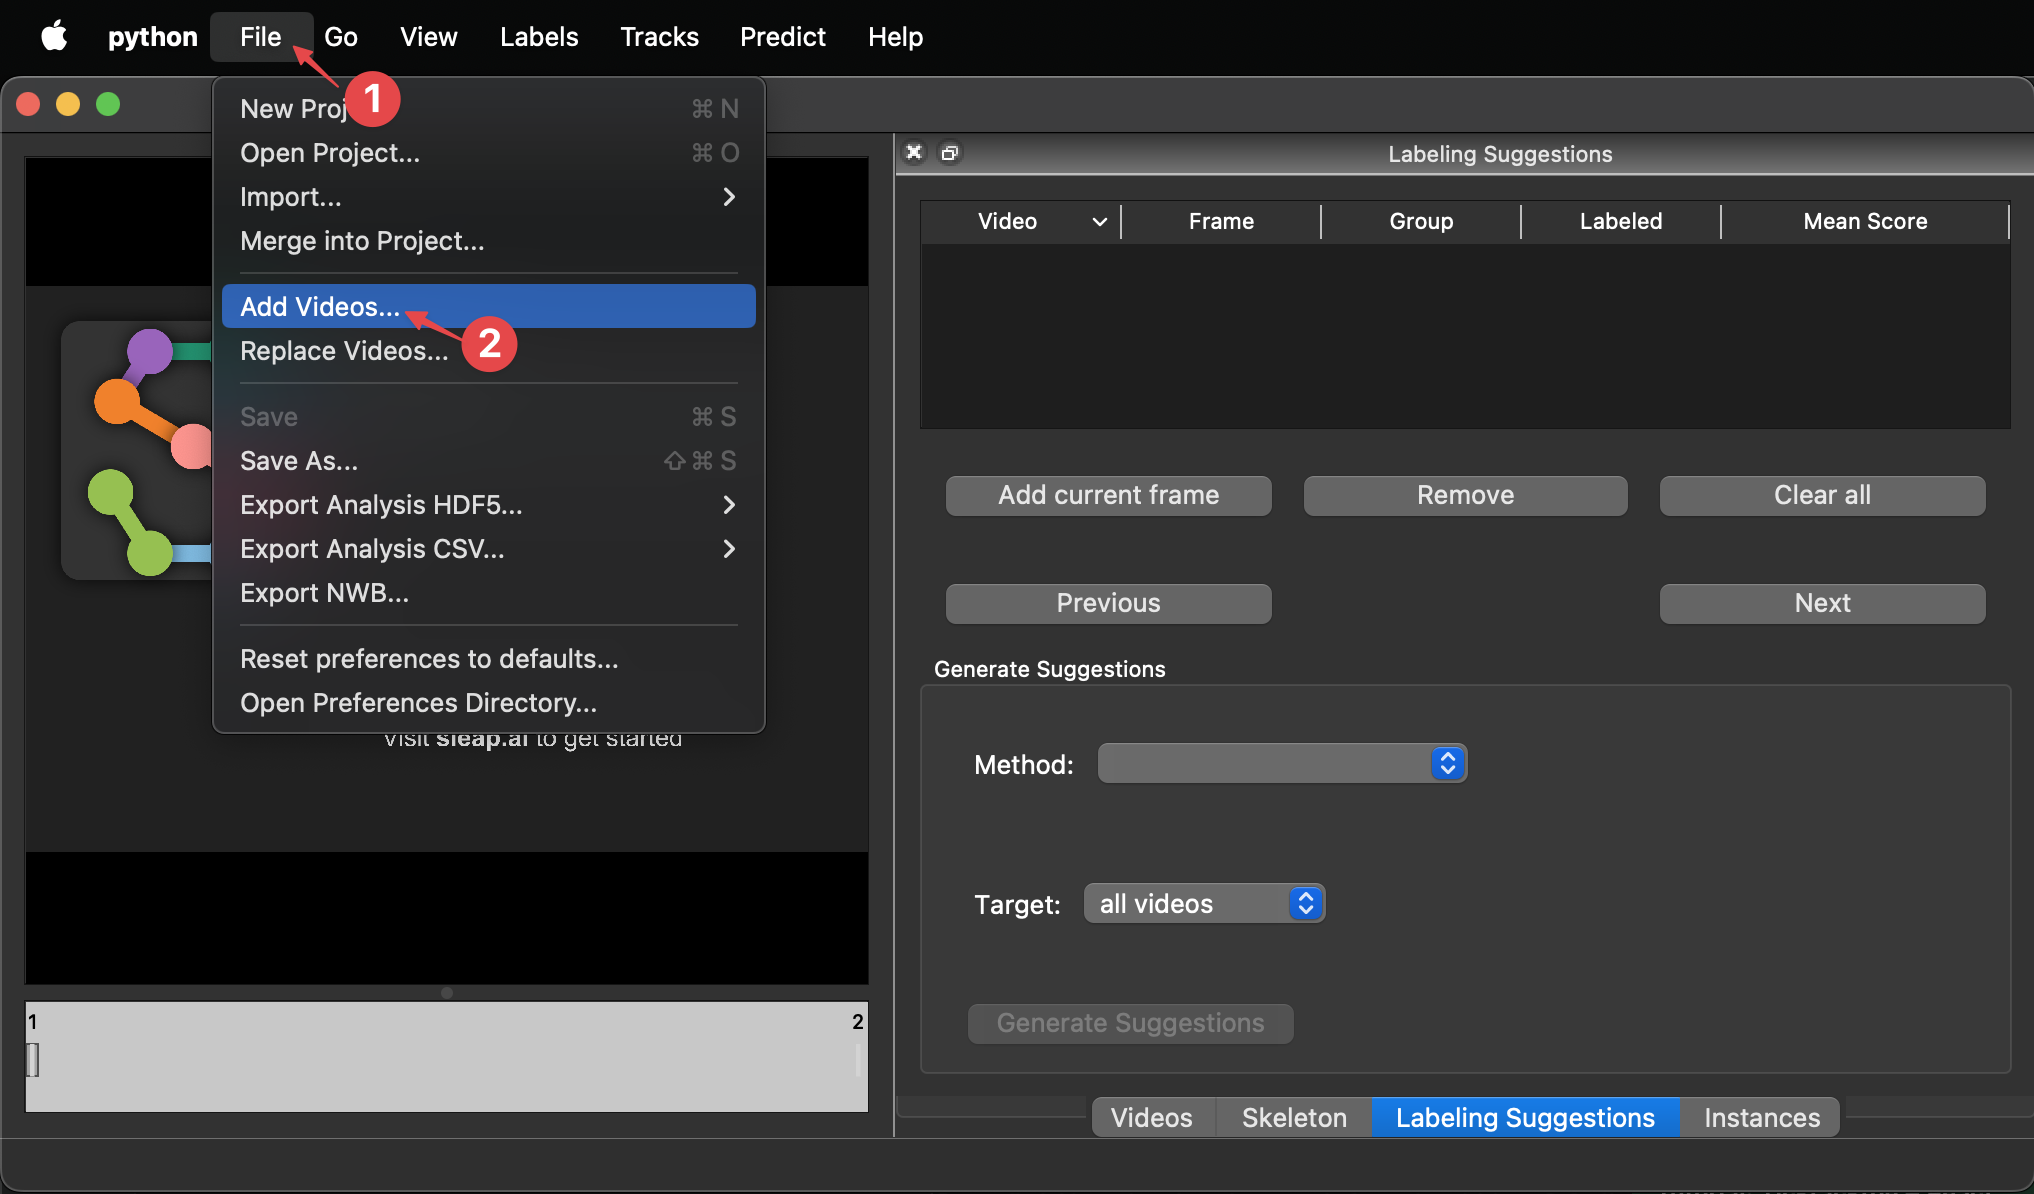
2. Go to **File** → **Add Videos...** to open the file browser.
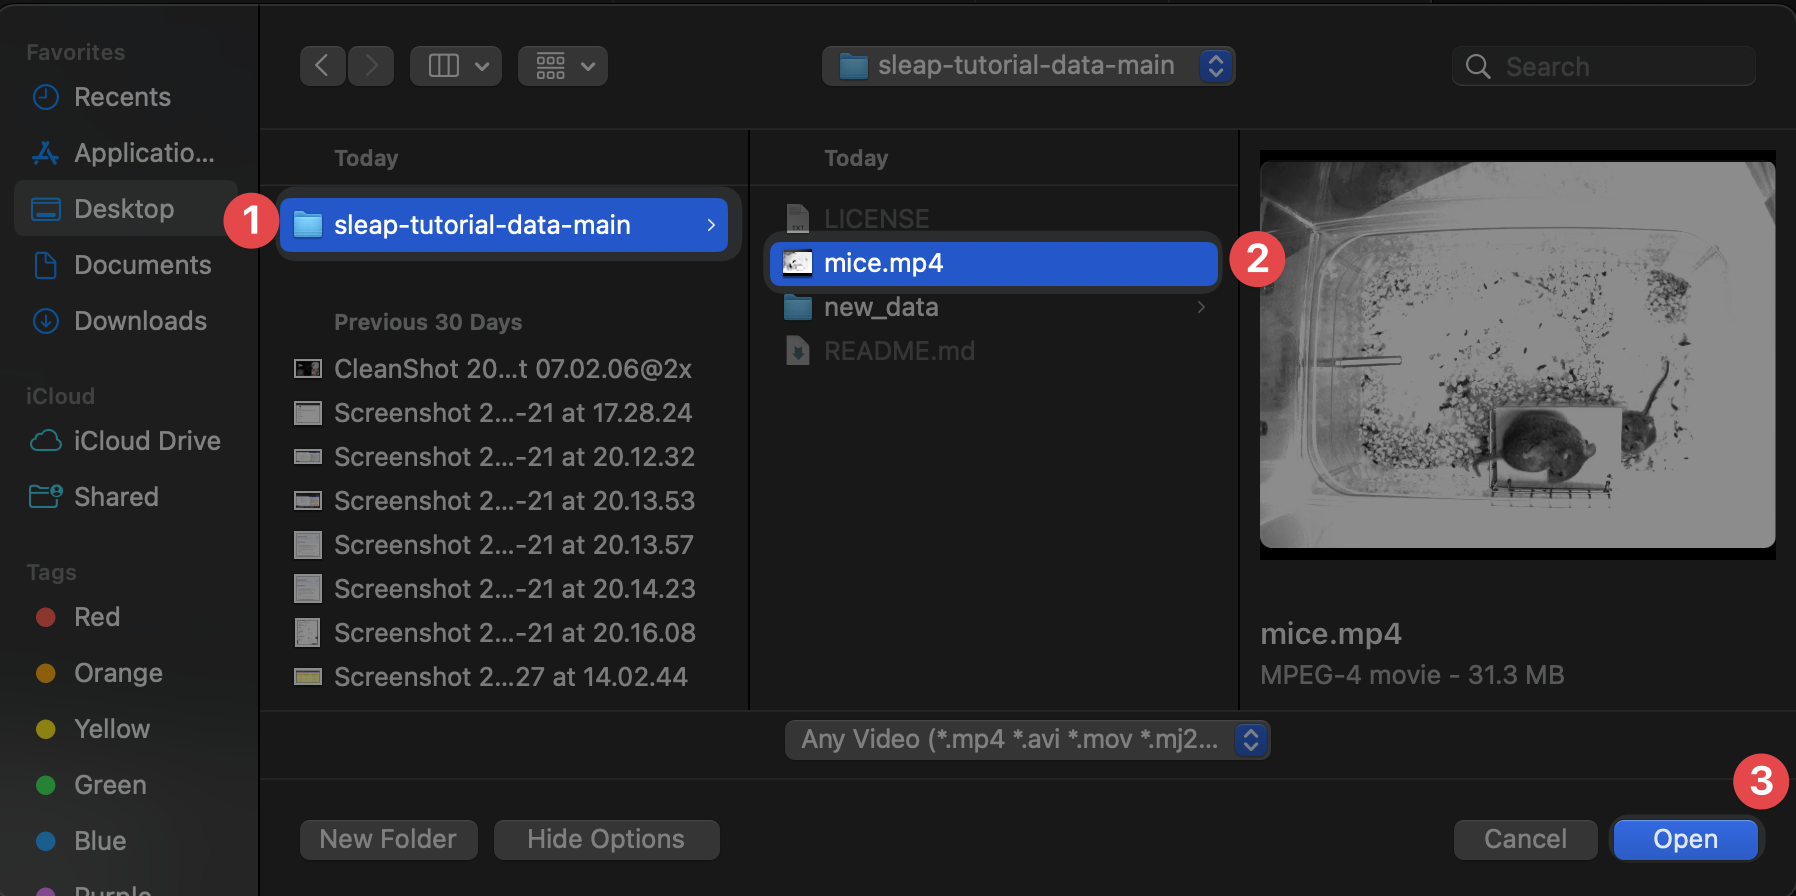
3. **Open** the mice.mp4 from the git cloned folder **sleap-tutorial-data-main**. For future reference, SLEAP supports a wide range of video and image formats[^1].
[^1]: SLEAP supports common video formats (mp4, avi, mov, mkv), HDF5 files (h5, hdf5), image sequences (png, jpg, jpeg, bmp), and TIFF stacks (tif, tiff). For video files, you may be asked whether to import as grayscale. For HDF5 files, you'll be asked the dataset and whether the video is stored with channels first or last. See the [sleap-io documentation](https://io.sleap.ai) for full details on supported formats.
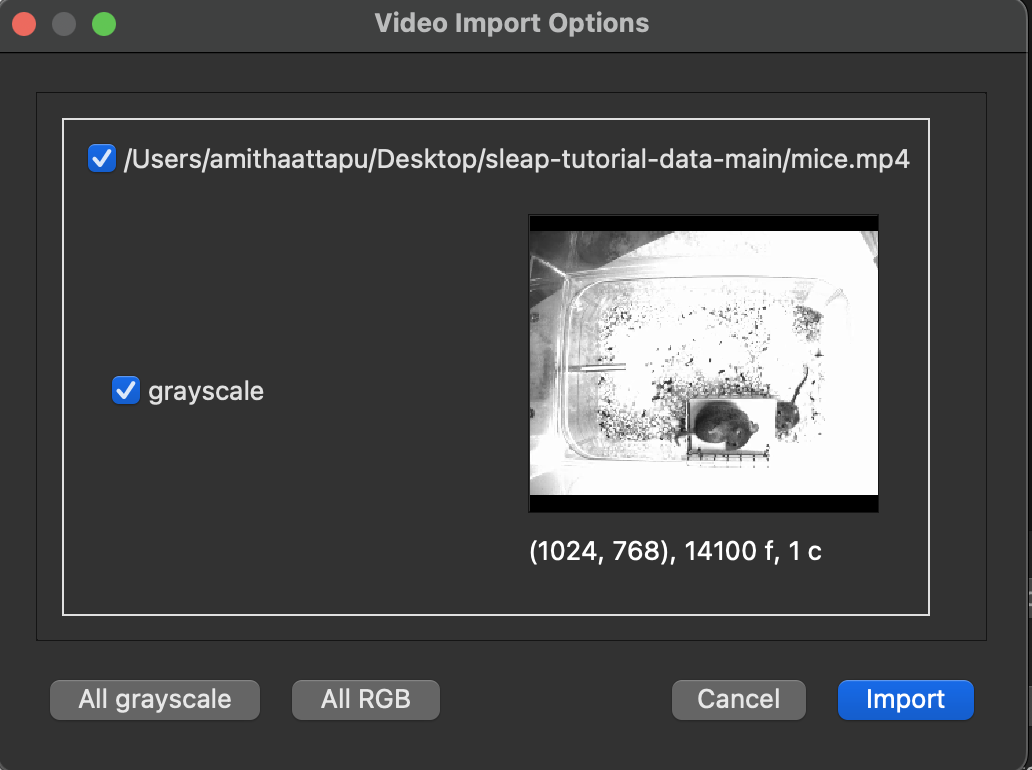
4. The video import interface will appear. Click **Import** to finish adding the videos.
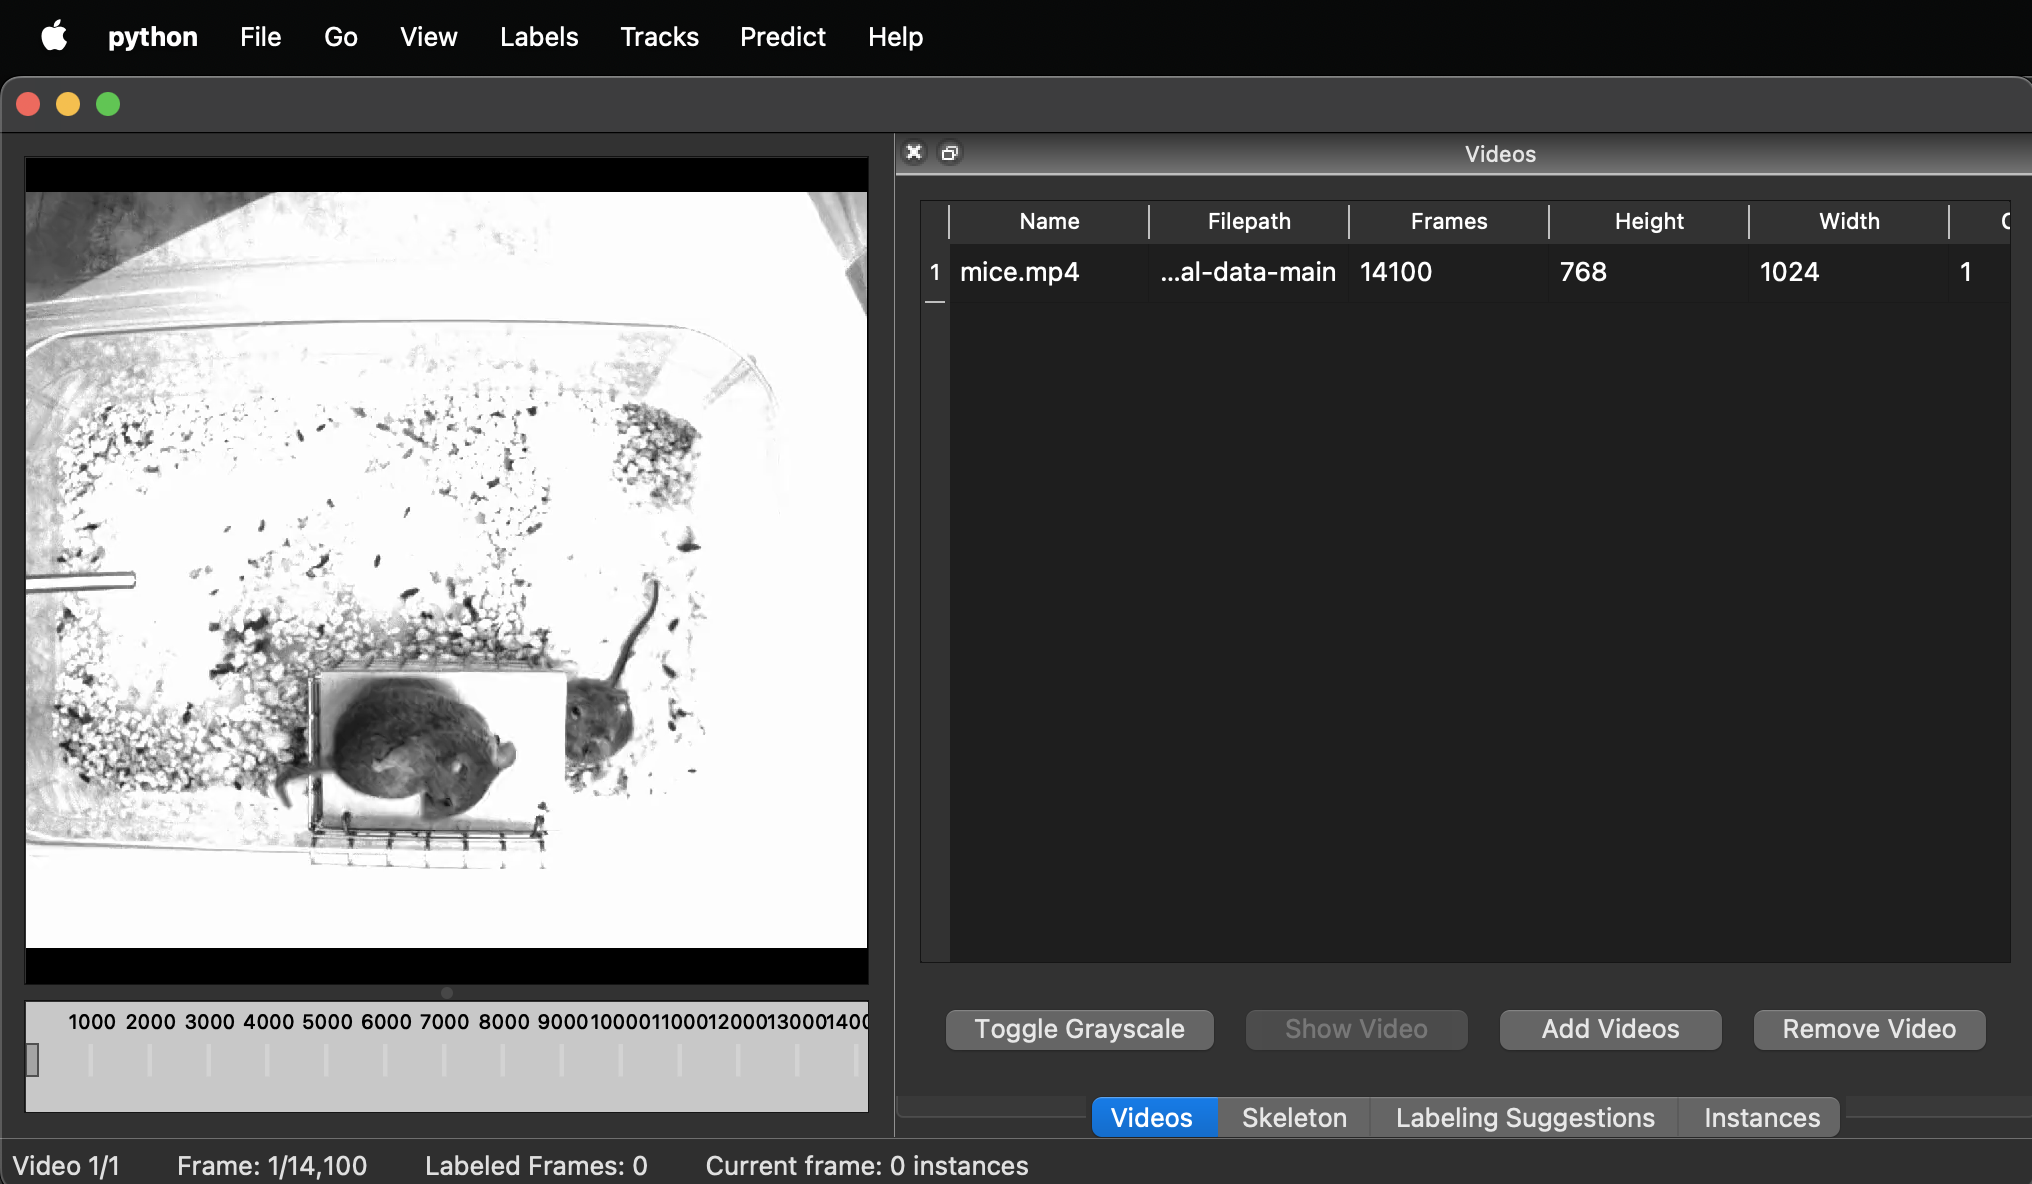
You'll now see the first video in the GUI:
## Configure skeleton
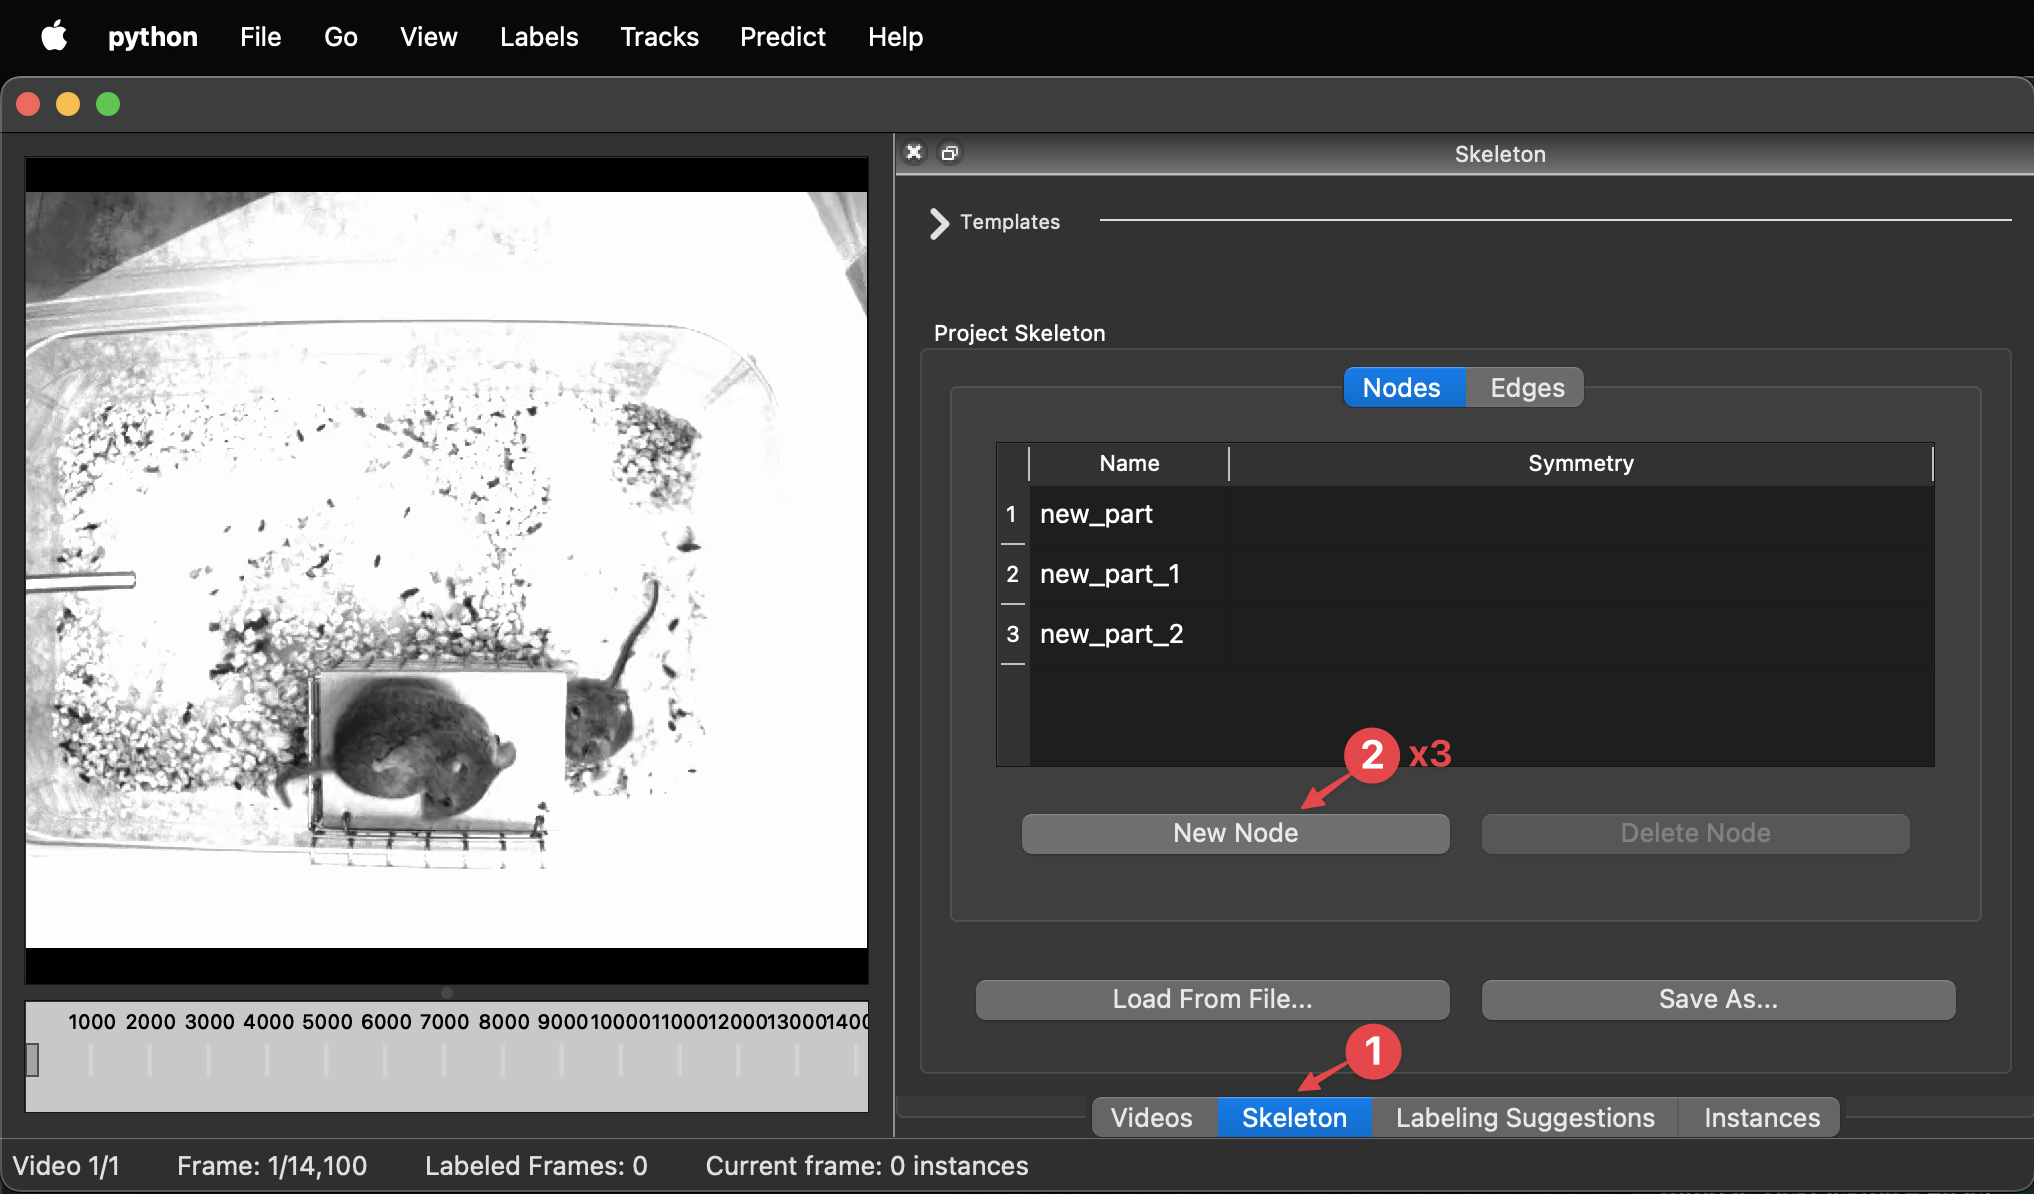
1. Click on the **Skeleton** tab on the right, then click on **New Node** three times to create three entries in the table.
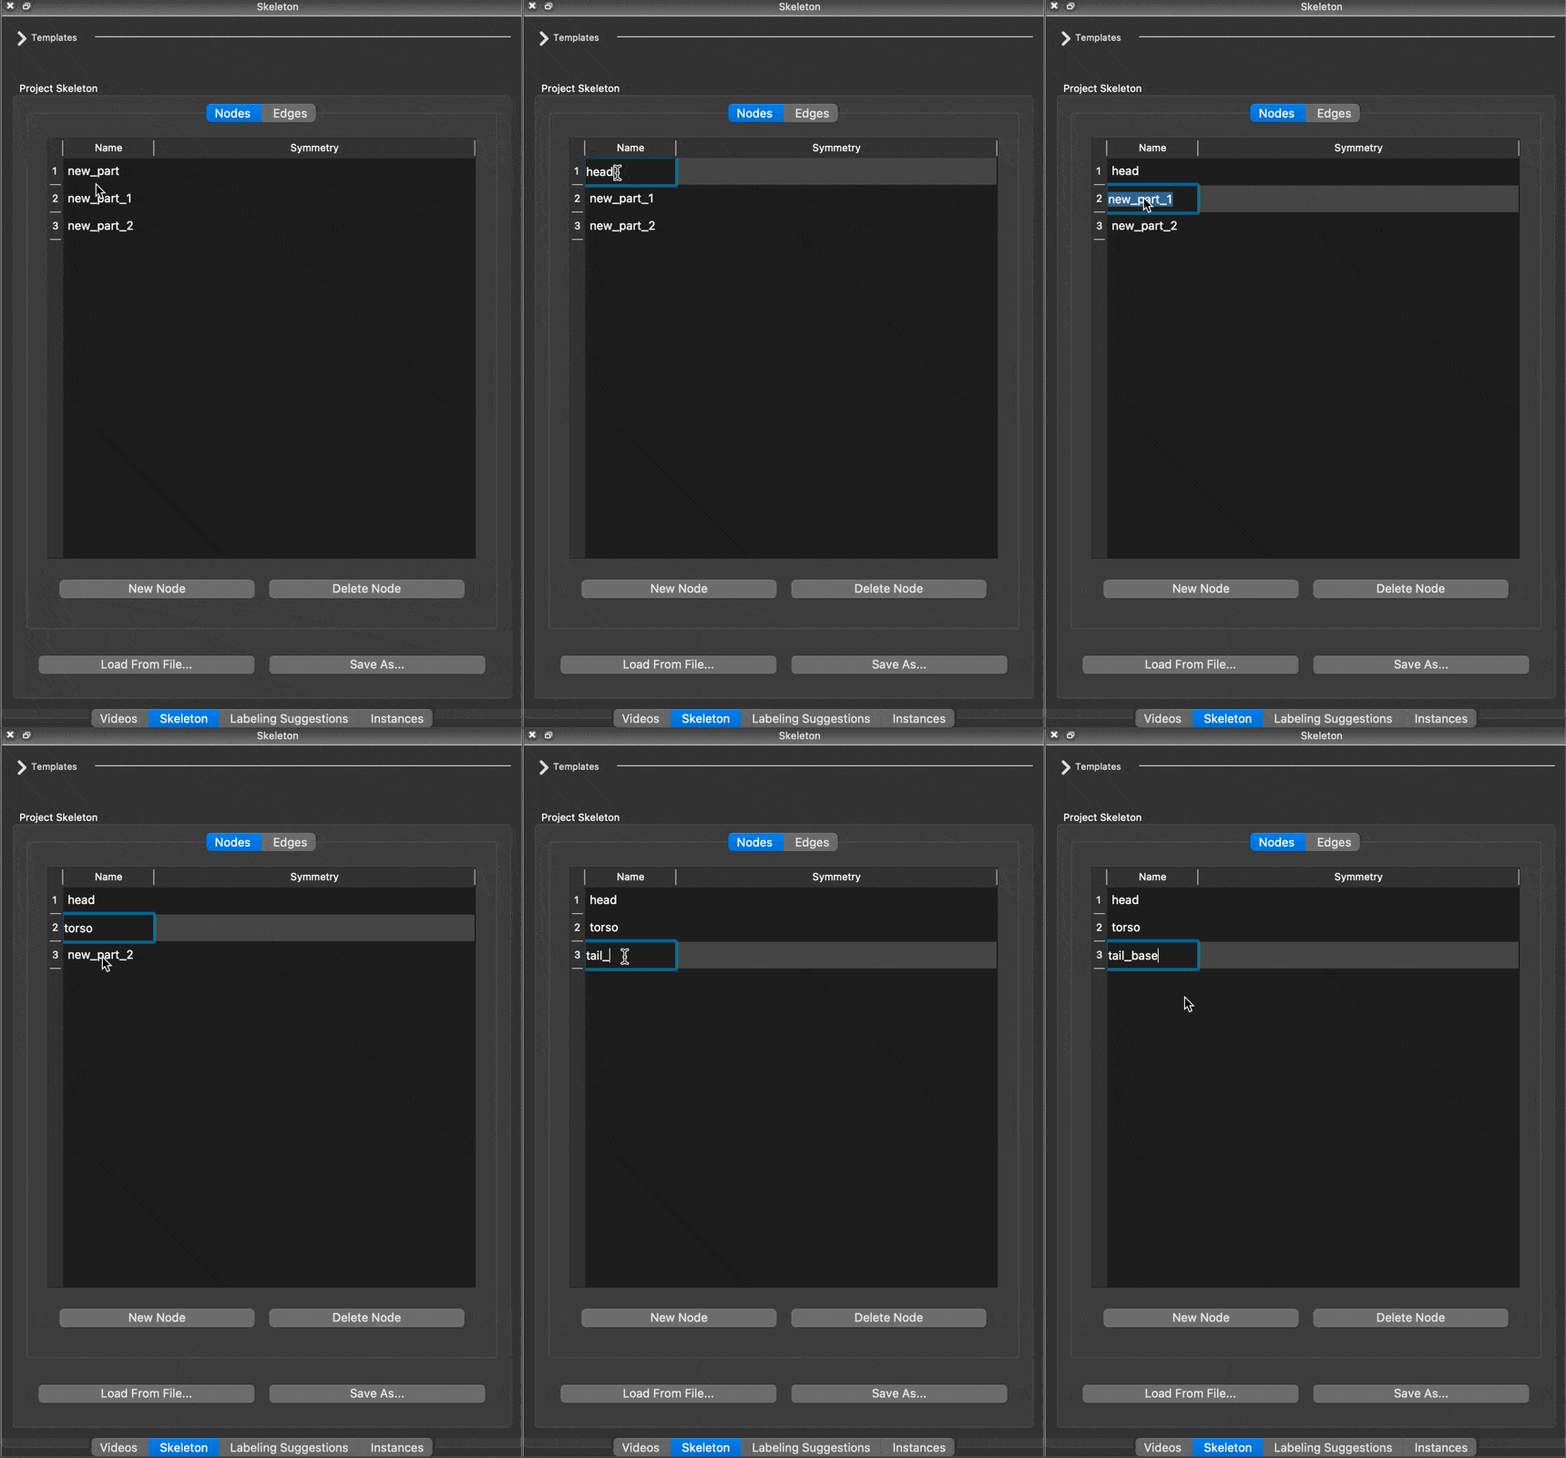
2. For each node, double-click on the name to edit it, then Enter to save.
Name them **head**, **torso**, and **tail_base**.
3. Switch to the **Edges** tab and add connections: **torso** → **head**, and **torso** → **tail_base**.
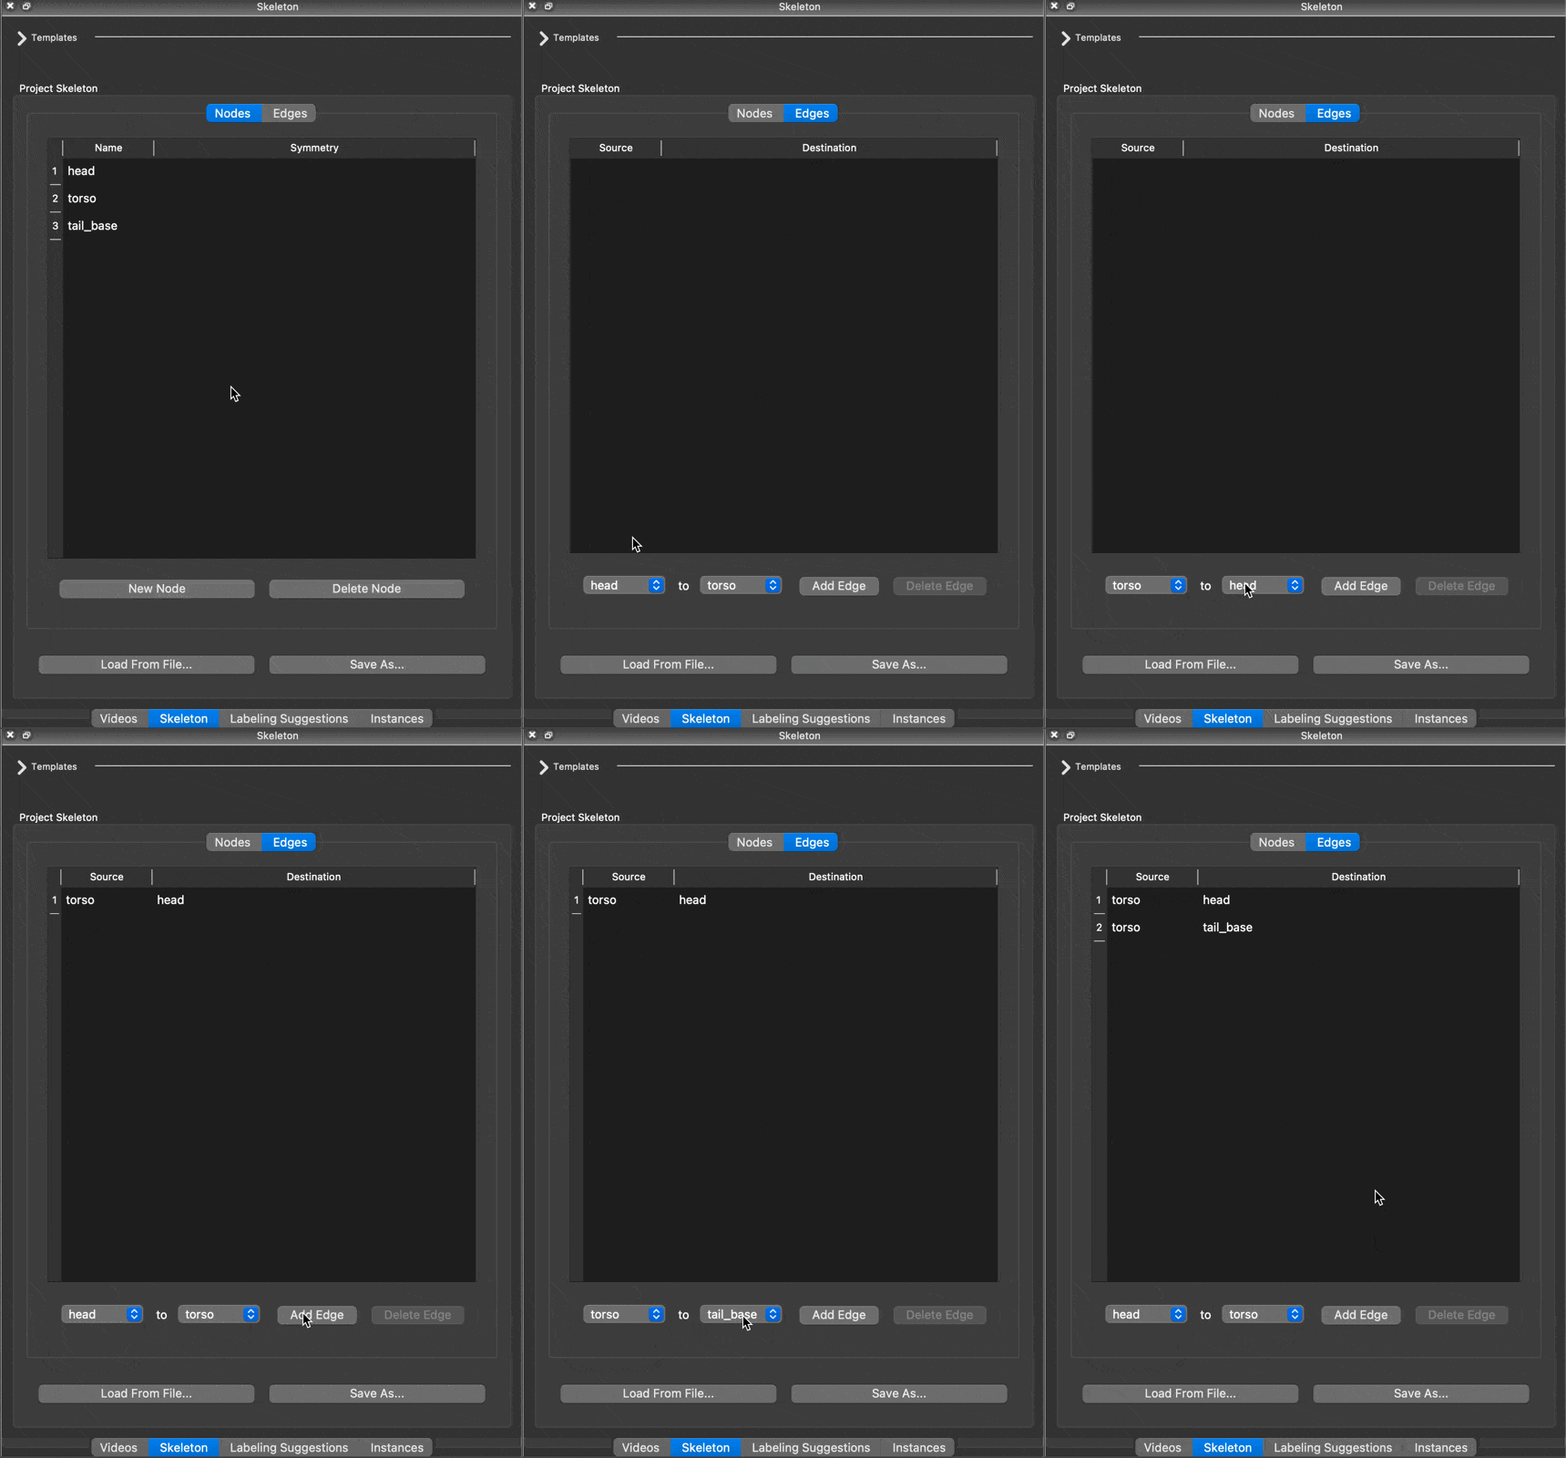
The final skeleton setup should look like this:
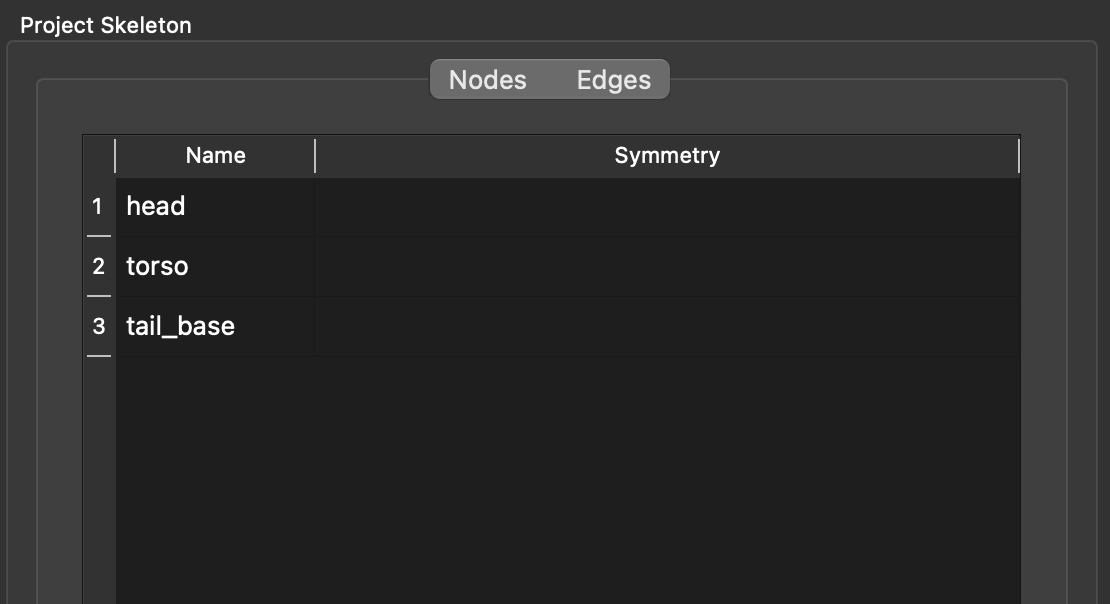
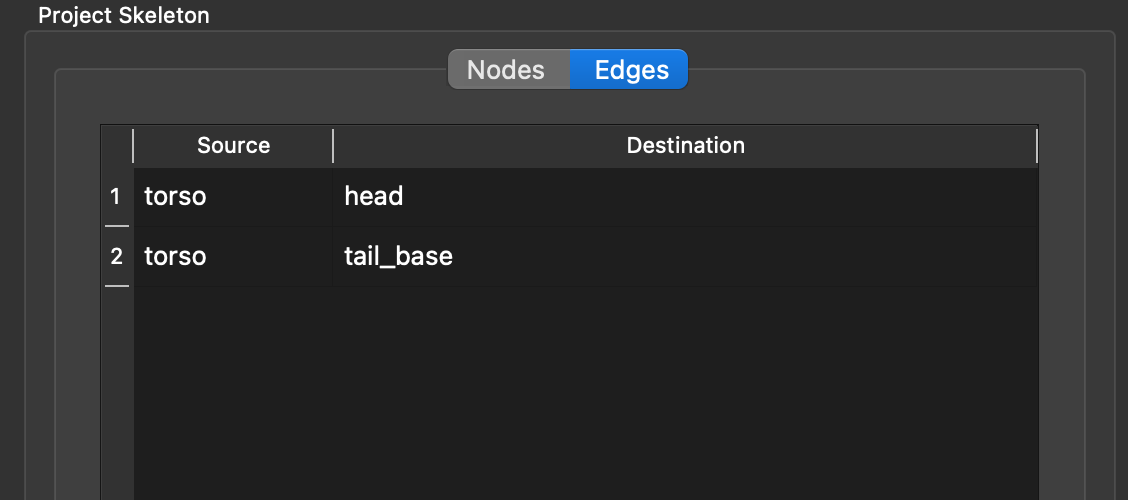
You did it!
[*Next up:* Initial labeling](initial-labeling.md)