Prediction-Assisted Labeling
Prediction-assisted labeling accelerates your workflow by using model predictions to bootstrap new labels.
Benefits:
- Faster labeling — Correcting a mostly-correct prediction is quicker than labeling from scratch
- Targeted feedback — See where your model succeeds and fails, helping you choose the most useful frames to label
The Active Learning Loop
┌─────────────────────────────────────────────────────────┐
│                                                         │
│   Label frames  →  Train model  →  Predict  →  Correct  │
│        ↑                                          │     │
│        └──────────────────────────────────────────┘     │
│                                                         │
└─────────────────────────────────────────────────────────┘
- Label a small set of frames manually
- Train a model on your labels
- Predict on suggested or unlabeled frames
- Correct the predictions to create new training data
- Repeat until accuracy is satisfactory
Understanding the Seekbar
After running inference, the seekbar shows different markers:
| Marker | Meaning |
|---|---|
| Thick black line | Manually labeled frame |
| Thin black line | Frame with predictions |
| Dark blue line | Suggested frame with manual labels |
| Light blue line | Suggested frame with predictions |
| Red marker | Suggested frame ready for review |
Correcting Predictions
Predicted instances appear in grey with yellow nodes. To edit them:
- Double-click the predicted instance to convert it to an editable instance
- Adjust the nodes as needed
- Save your changes
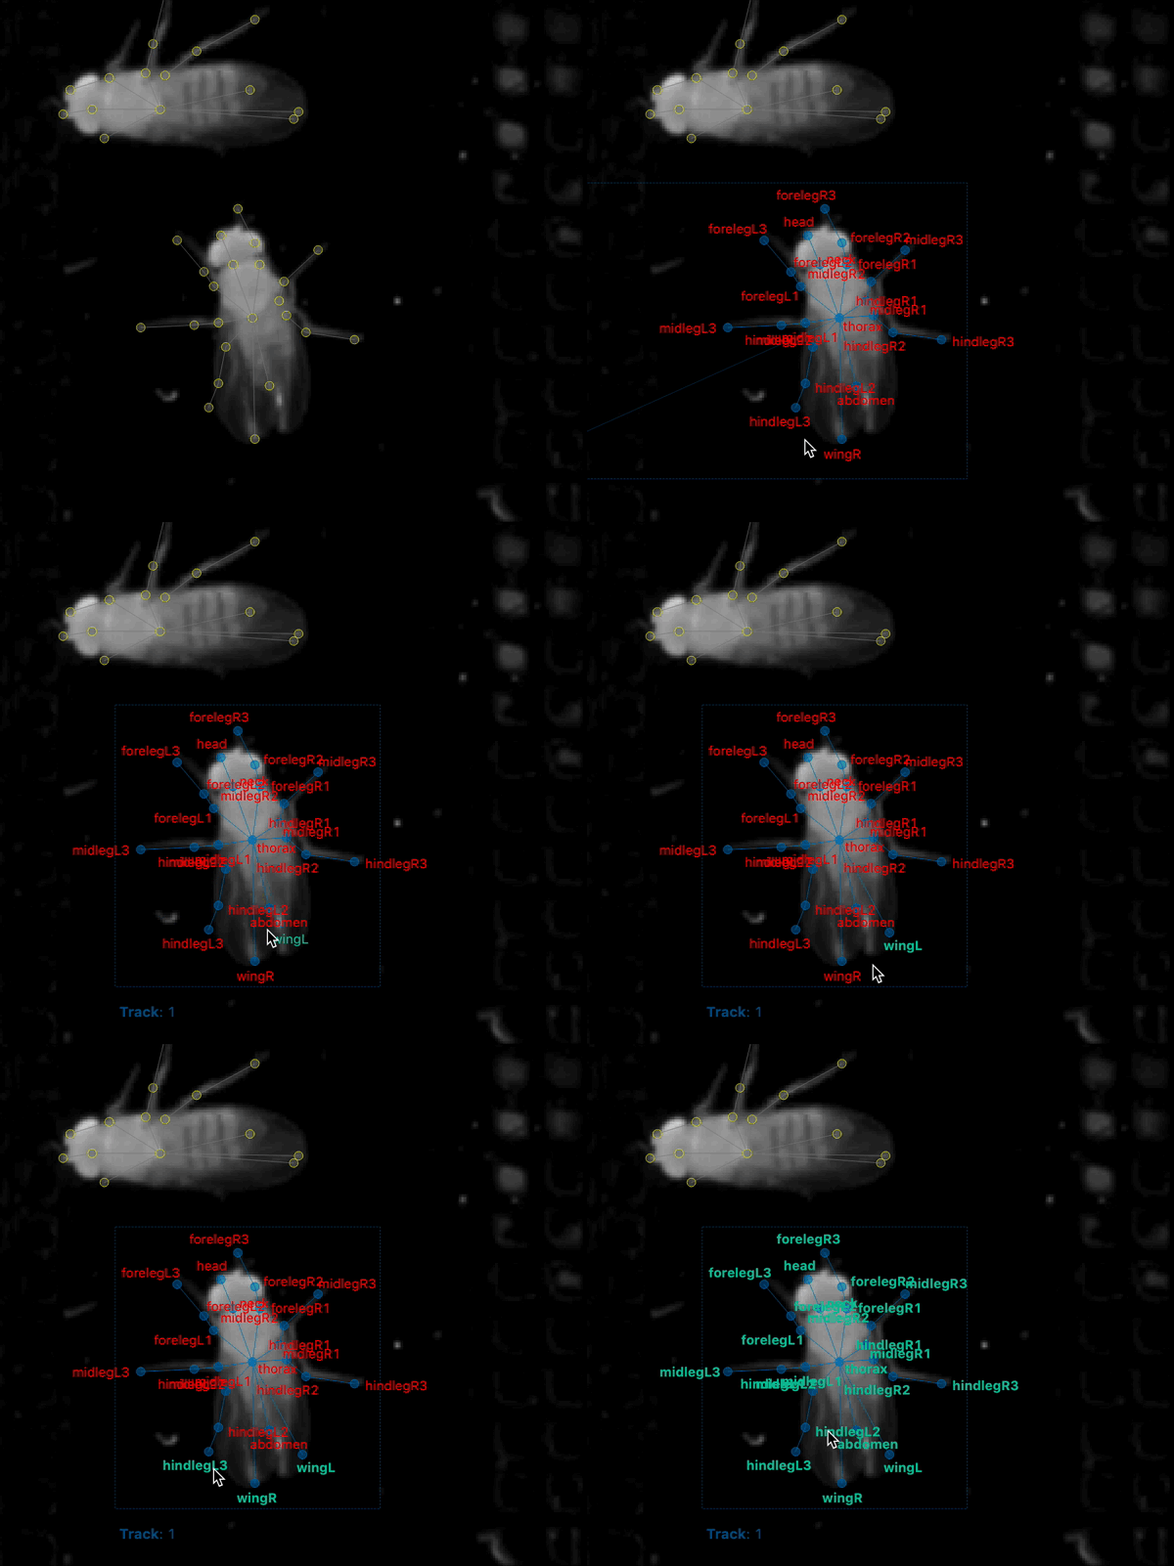
Visual feedback
After converting a prediction:
- Red nodes = unchanged from prediction
- Green nodes = manually adjusted
This helps you track which nodes you've reviewed.
Predictions don't train automatically
Predicted instances are not used for training until you convert and correct them. Always double-click to convert before making edits.
Best Practices
-
Generate new suggestions regularly — Active learning works best with fresh suggestions based on your latest model
-
Focus on failure cases — Prioritize frames where predictions are wrong or uncertain
-
Don't over-correct — If a prediction is close enough, a small adjustment is fine
-
Iterate frequently — Several rounds of train → predict → correct typically yields better results than one large labeling session
Next Steps
Once you have accurate frame-by-frame predictions, you're ready to:
- Run inference on full videos — Predict poses across entire clips
- Track identities — Link instances across frames (see Tracking methods)
- Proofread tracks — Use the proofreading tools to fix tracking errors